

Getting printers to the right people at the right time in the right place is a very simple and straightforward process when using PrinterLogic’s software for printer management. It has a feature called Advanced Deployments that allows you to set up a multi-criteria requirement that will auto-deploy printers to the qualifying users based on said criteria. You can specifically allow or deny access to the criteria. These are the criteria you can specify:
- Active Directory User, Computer, or Group
- Active Directory Container, or OU
- IP Address Range
- Hostname
- MAC Address
- Terminal Service Session
Here are steps that you can follow to setup Advanced Deployments within PrinterLogic:
- Log into the PrinterLogic Administration webpage. (Typically you open a web browser and go to the FQDN or DNS Alias address of the PrinterLogic webserver followed by “/admin”)
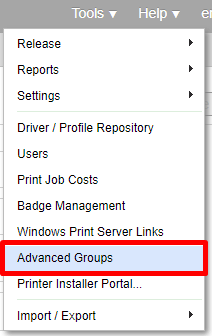
- Go to the top right corner and select “Tools > Advanced Groups”
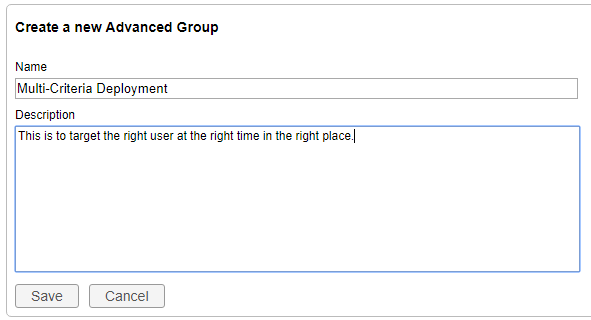
- Create an Advanced Group deployment by clicking “Add” and give it a name to easily identify it later.
- There are two types of “Operation” choices. One is “Contained in” and the other is “Excluding”.
- If you want to add the criteria and have that criteria receive the printer, then you’ll select “Contained in”.
- If you want to exclude anyone that matches your criteria, then you’ll select “Excluding”
- To select criteria, hit the drop-down menu labeled “Select a rule type…” and pick how you want to deploy either a specific printer or group of printers.

- Click on the “+” button to add multiple criteria or rules for deployment.
- Once you have your Advanced Group created, go back to the main menu of the Administration webpage by clicking on “Return to tree view” at the top right
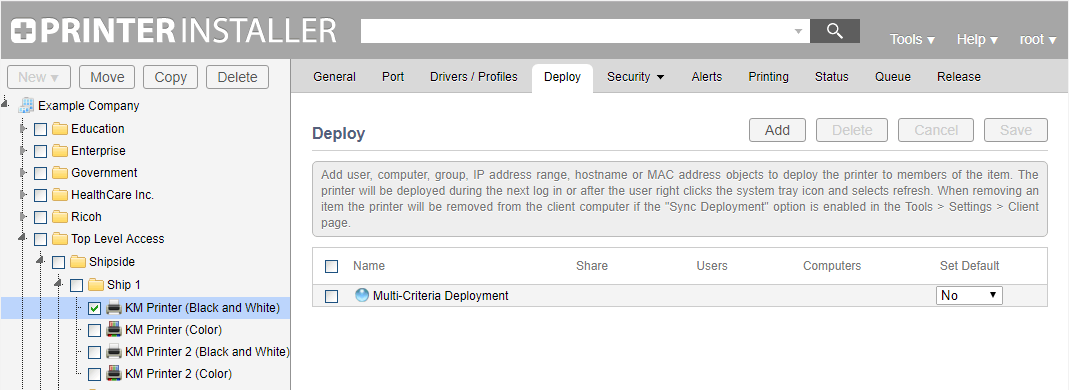
- Select a printer that you need to deploy to your Advanced Group and go to the “Deploy” tab
- Click “Add > Advanced Group” and select the group you created for the deployment of the selected printer and click “Add”.
- You now have the option to set this printer as the default printer for anyone that matches the criteria exactly. You can set it to install automatically as the default “Once”, “Always” or “No”.
- Click “Save” to complete the auto-deployment
The next time the PrinterLogic desktop software checks in with the server hosting PrinterLogic it will auto-install the printer to whoever matches the criteria. If users don’t match the criteria exactly then it will not auto-install. If they matched the criteria before but no longer match it in the future, the printer will be removed from their desktop.
You are not limited to one deployment per printer. You can set up multiple deployments for the same printer, and it does not have to only include Advanced Groups in the deploy menu of a printer either. Simply put, if there is a deployment added to a printer and you match the criteria set, then you will get the printer automatically installed when you log into your desktop.
One example of an organization that uses the Advanced Group deployment is a healthcare customer that uses thin clients as the nurses’ workstation. Throughout the day, the nurses will log into the thin clients across the healthcare campus. While they can be the same user logging in each time, they get a unique experience with regards to available printers because PrinterLogic’s Advanced Groups are in place. They have their advanced group set up so that a nurse needs to be in a specific OU, logged into a certain thin client, and have hostname that matches naming convention they set up for the different floors. With PrinterLogic’s Advanced Deployments, nurses can go where they need to go and have the satisfaction of getting the closest printer automatically added to their workstation no matter where they are in the hospital.
PrinterLogic provides a free complimentary proof of concept to anyone that would like to test this feature. Simply go to printerlogic.com and start your free trial today.