

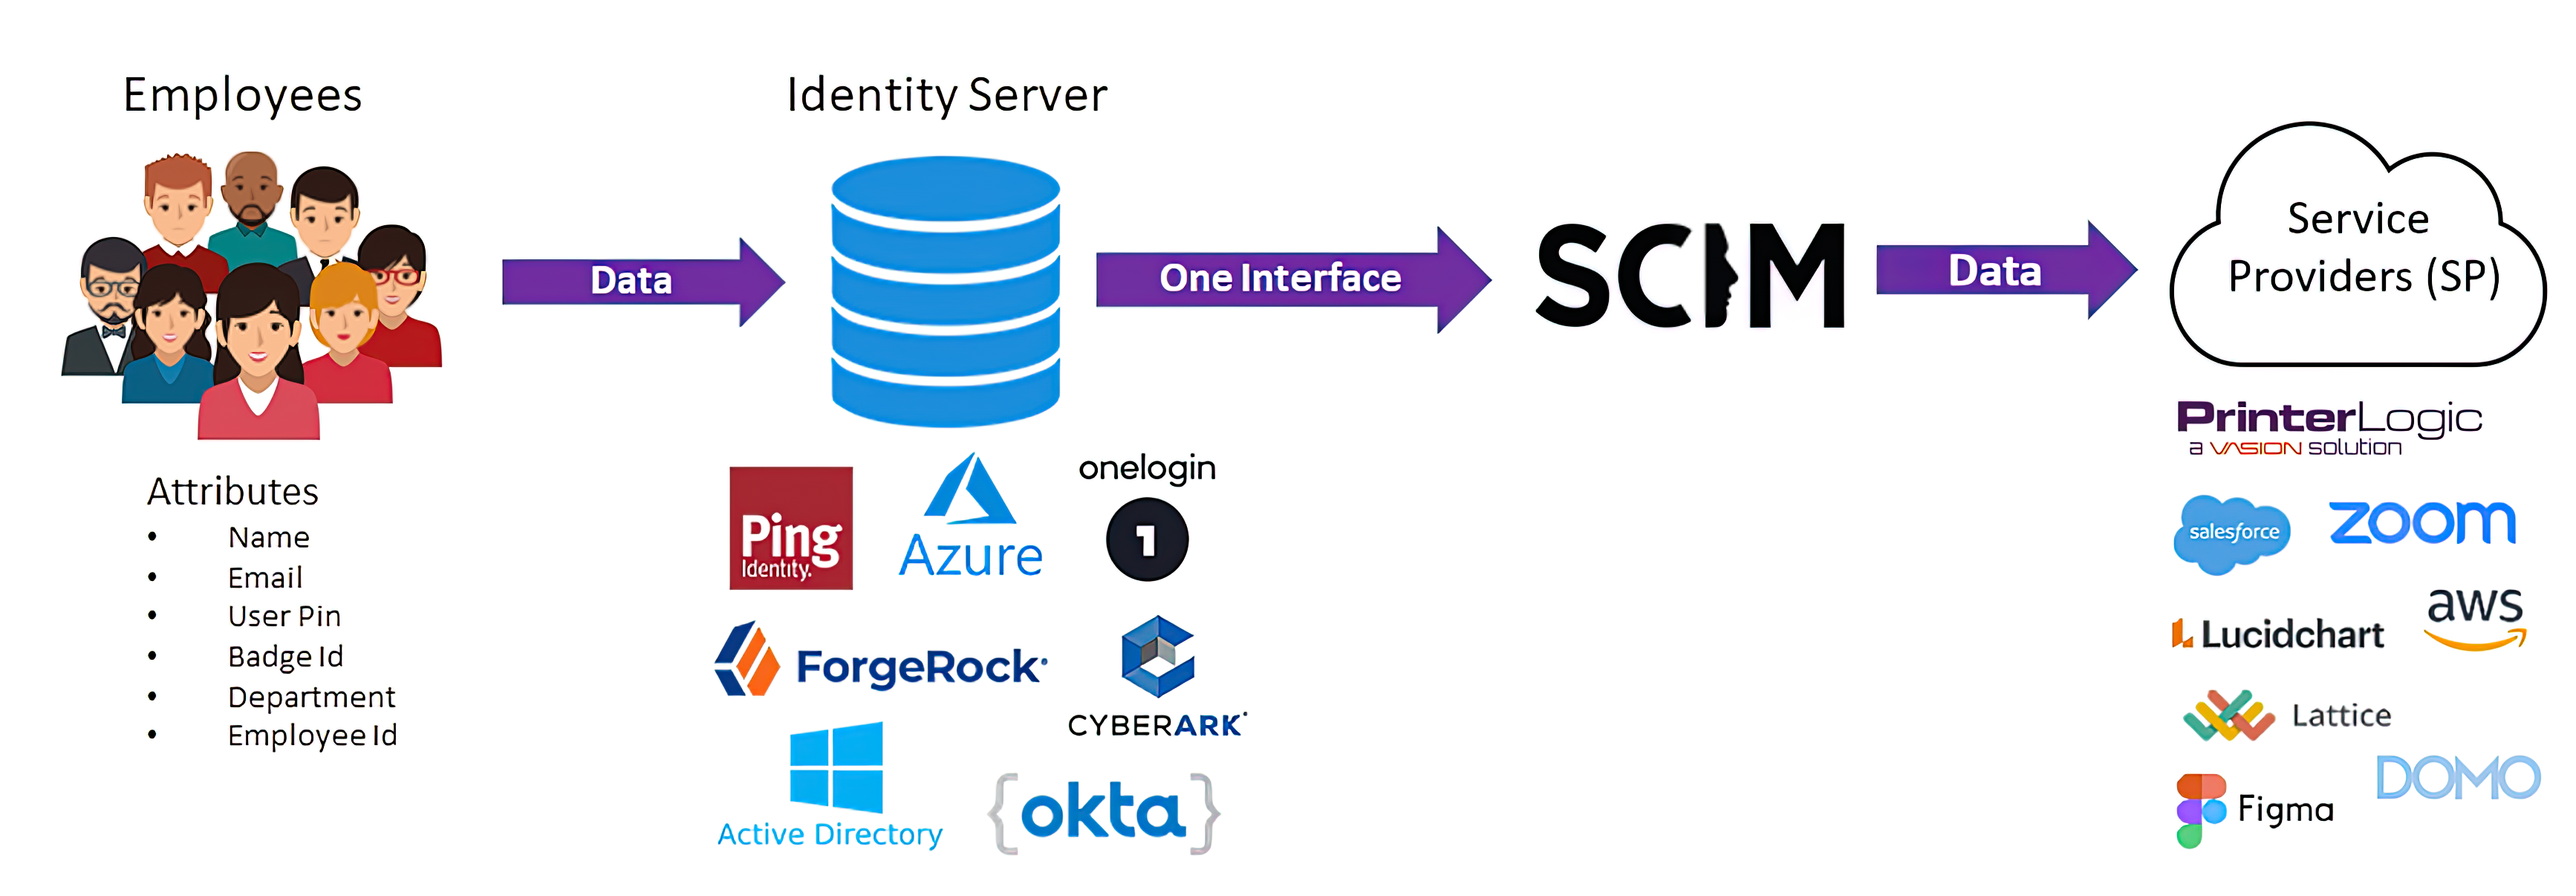
As companies move to the cloud, they often retire their legacy LDAP systems and begin using SaaS Identity Providers (IdPs), a topic discussed in an earlier blog. One of the specifications required by many IdPs is SCIM, a System for Cross-domain Identity Management. SCIM synchronizes data related to which employees are authorized users of an application and which ones are not.
At Vasion, we created a SCIM client to automatically provision users and groups inside the PrinterLogic application. The interface complies with the SCIM specification and works with all three SCIM implementations used by major IdPs. In this blog post, we’ll discuss the purpose of SCIM, how it works, and how you can set it up in PrinterLogic.
What is SCIM?
SCIM is an open standard that manages user identity information. It securely automates the exchange of user identity data between an organization and SaaS applications such as PrinterLogic. Cloud applications like PrinterLogic are known as “service providers” (SPs) in the SCIM topology.
As company employees come and go, their access to enterprise applications is added or removed. If the enterprise uses an IdP that employs SCIM, an IT admin makes employee access changes in one place – the IdP – and those changes are automatically forwarded to SP applications (see diagram below). This greatly simplifies an IT admin’s job and ensures that employee app permissions don’t fall through the cracks.
How does SCIM work?
SCIM is an open standard specification used by an IdP for automating the exchange of user identity information. Consider an organization hiring new workers to replace employees who have recently left the company. The organization’s directory must be updated to reflect these changes, which enables access for the new employees and removes access for those who have gone.
To make a directory update, the IT administrator simply makes the needed change in the IdP admin console and the change is automatically pushed to all SCIM-enabled applications. This “edit once, change all” feature lets IT teams manage user identities faster and easier. Users authenticated by the IdP are then authorized to access PrinterLogic. They can print needed documents and use other SaaS applications to accomplish their assigned tasks.
Here’s a more in-depth look at how the SCIM process works. SCIM provides four basic capabilities: Create, Read, Update, and Delete. When an employee joins a company, a few steps take place:
- An IT admin creates their profile in the IdP admin console.
- The new employee’s userName, firstName, lastName, and email are “pushed” to the relevant applications via SCIM, and the account is created in the data store within the application.
- If needed, cloud apps can query or read the group info from the IdP.
- If an employee’s data changes (name change, email change, etc.), the IdP uses SCIM to push the data updates to SCIM-enabled apps like PrinterLogic.
- When an employee leaves the company, they are deleted from the IdP, which in turn deletes them from all application data stores.
How do I set up SCIM?
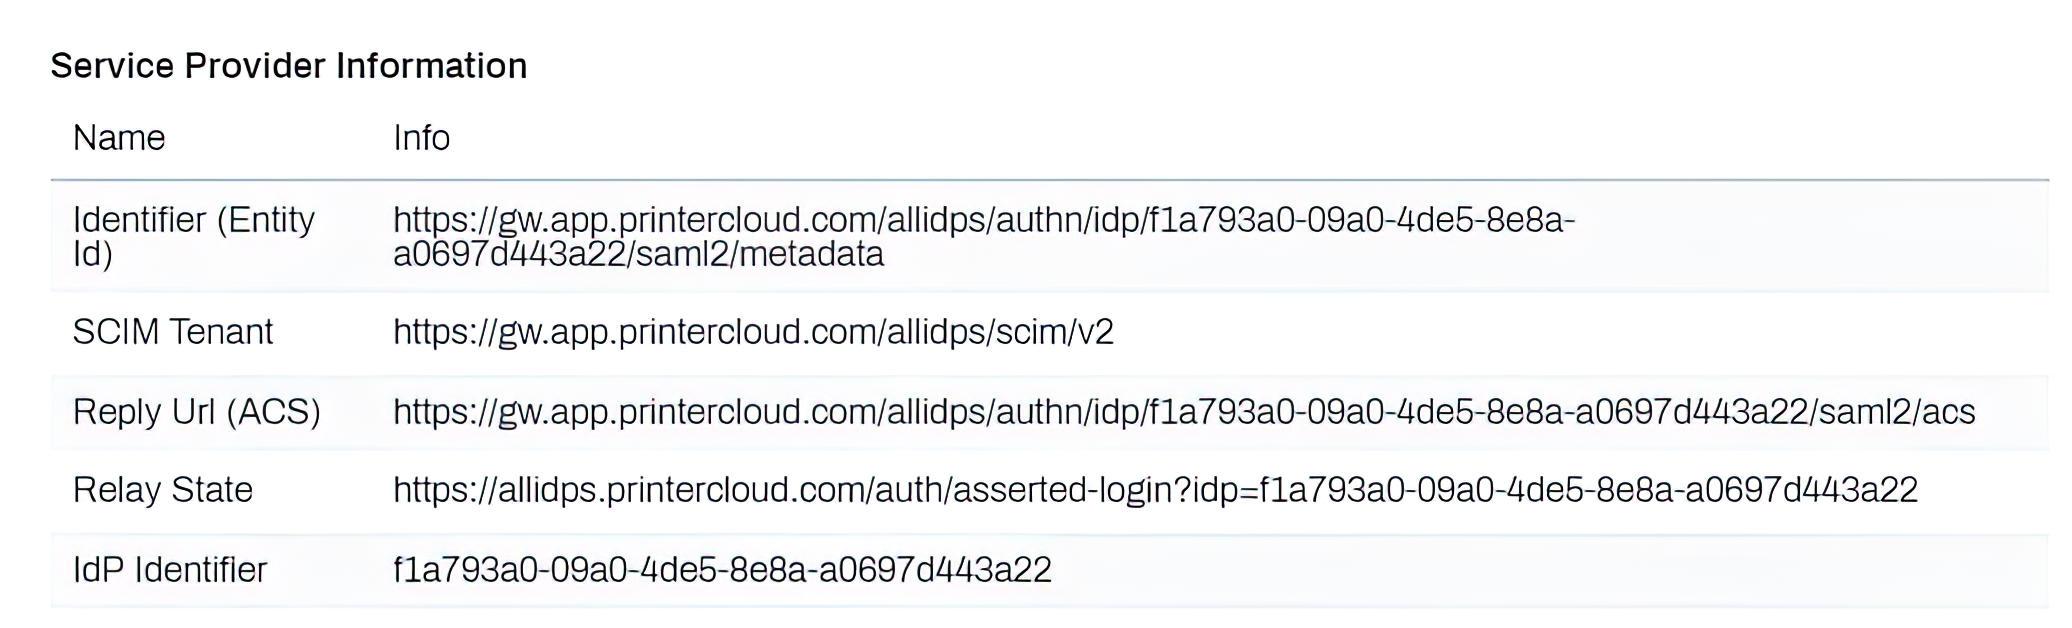
Setting up SCIM is fairly straightforward. First, the SP needs to provide the link to their SCIM client and a SCIM token. Every Service Provider creates a small software client (called a tenant) to receive SCIM information. For example, PrinterLogic provides the SCIM tenant on Tools>Settings>General>IdP Settings, as shown in the image below.
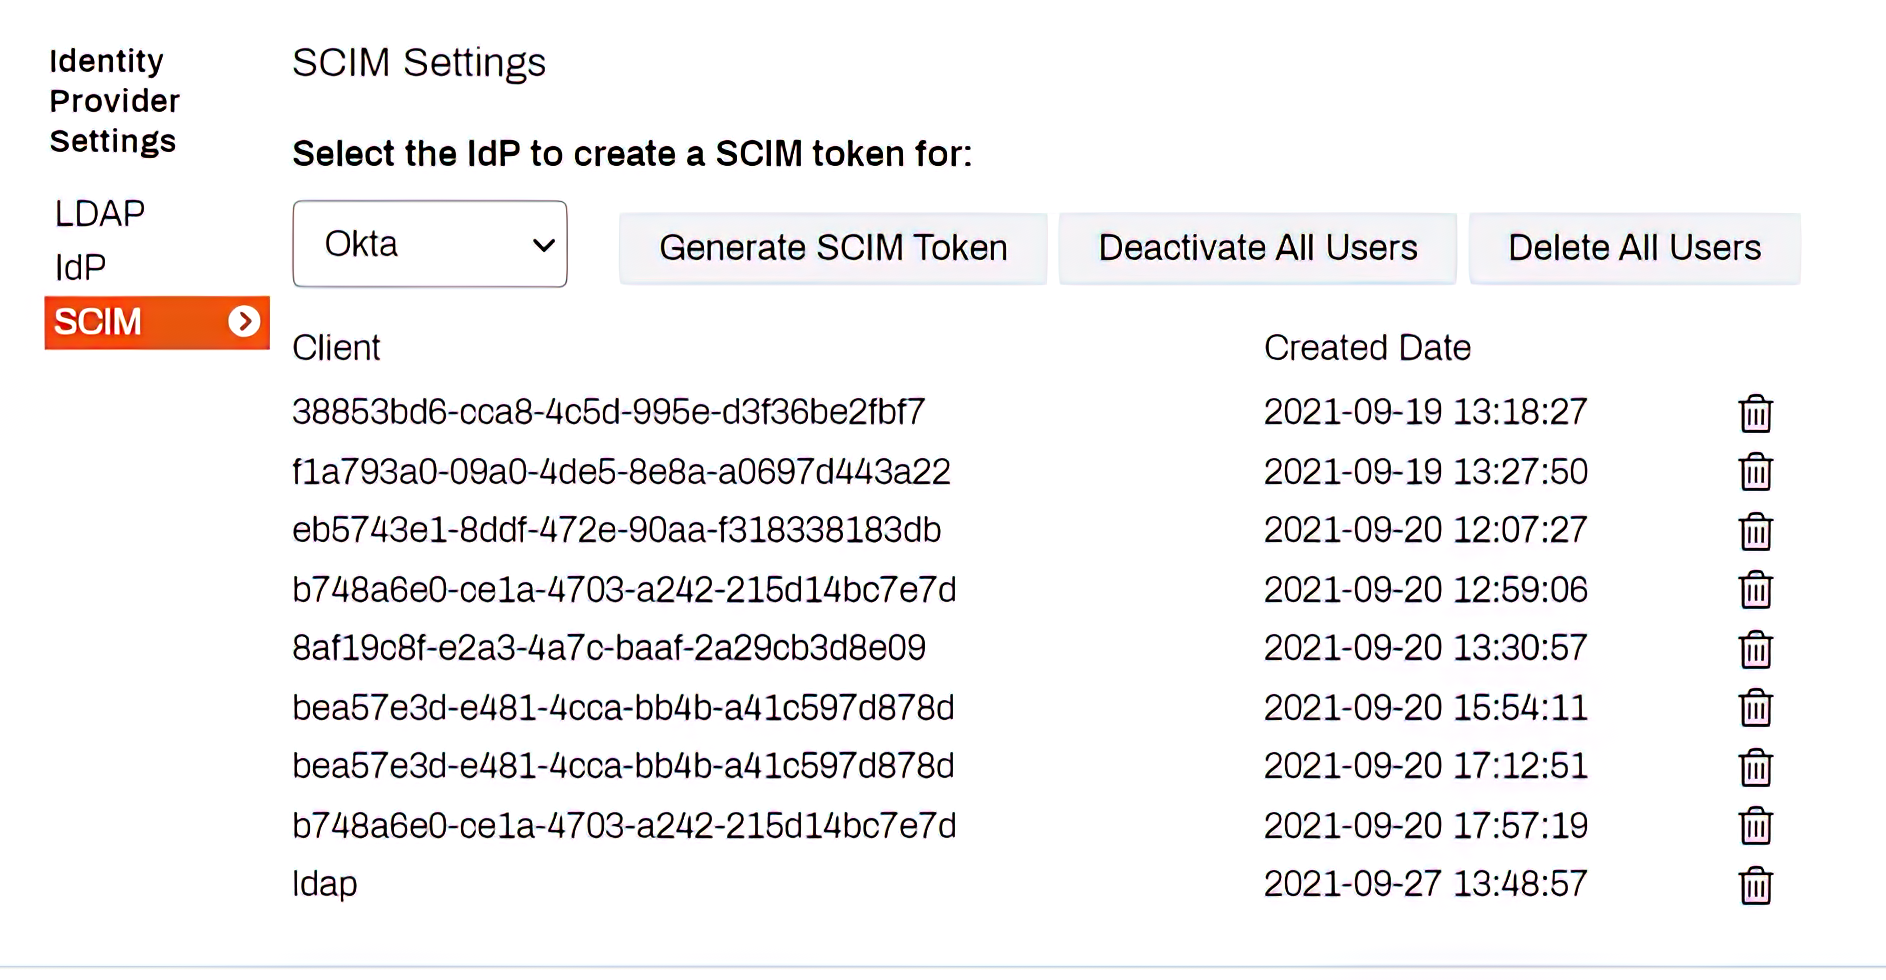
Second, the SCIM token is generated in the SCIM tab, as you can see below.
Finally, once you have the Relay State, IdP Identifier, and the SCIM token, that information will be used in the IdP.
The following are screen shot examples that show where that information is used in several leading IdPs.
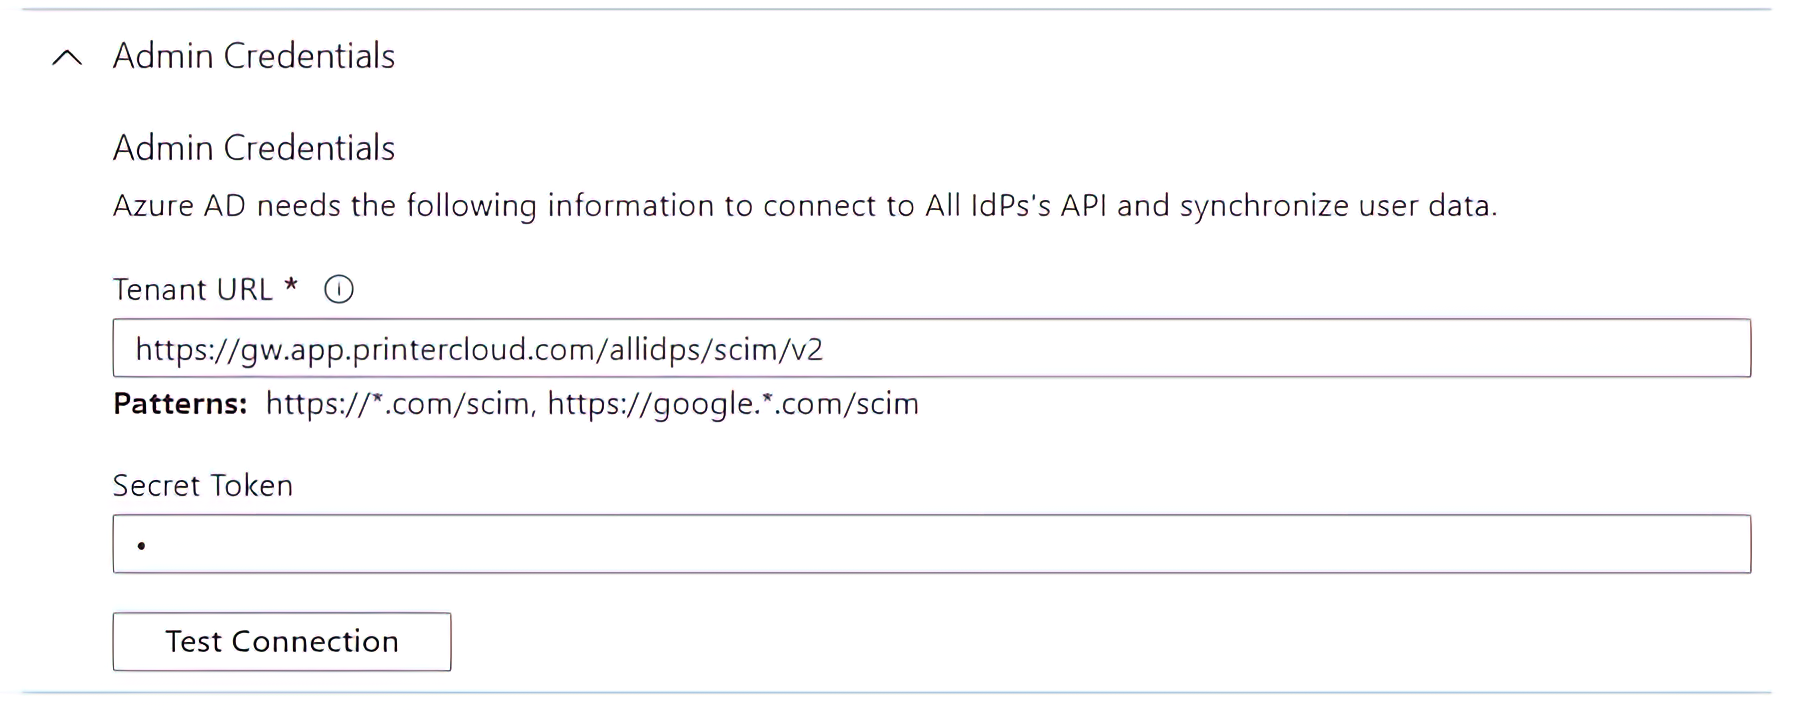
Microsoft Azure
In Microsoft Azure, the SCIM tenant URL and token are easily identified under the Admin Credentials pane.
Okta
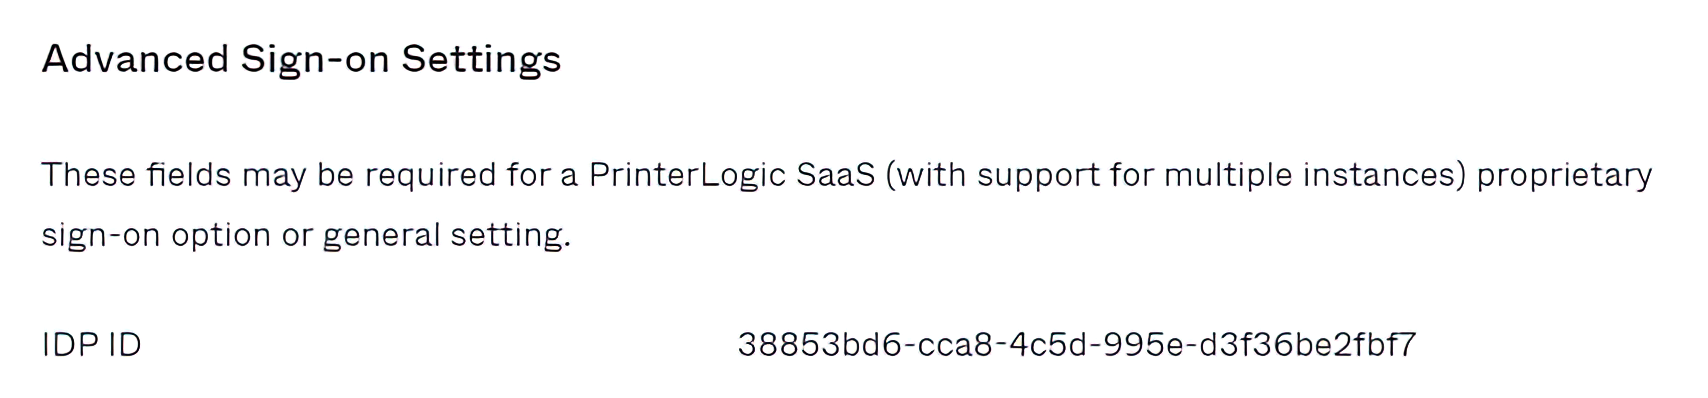
In Okta the Tenant URL is set up in the Sign On tab – it is automatically created by entering the IdP ID of the instance.
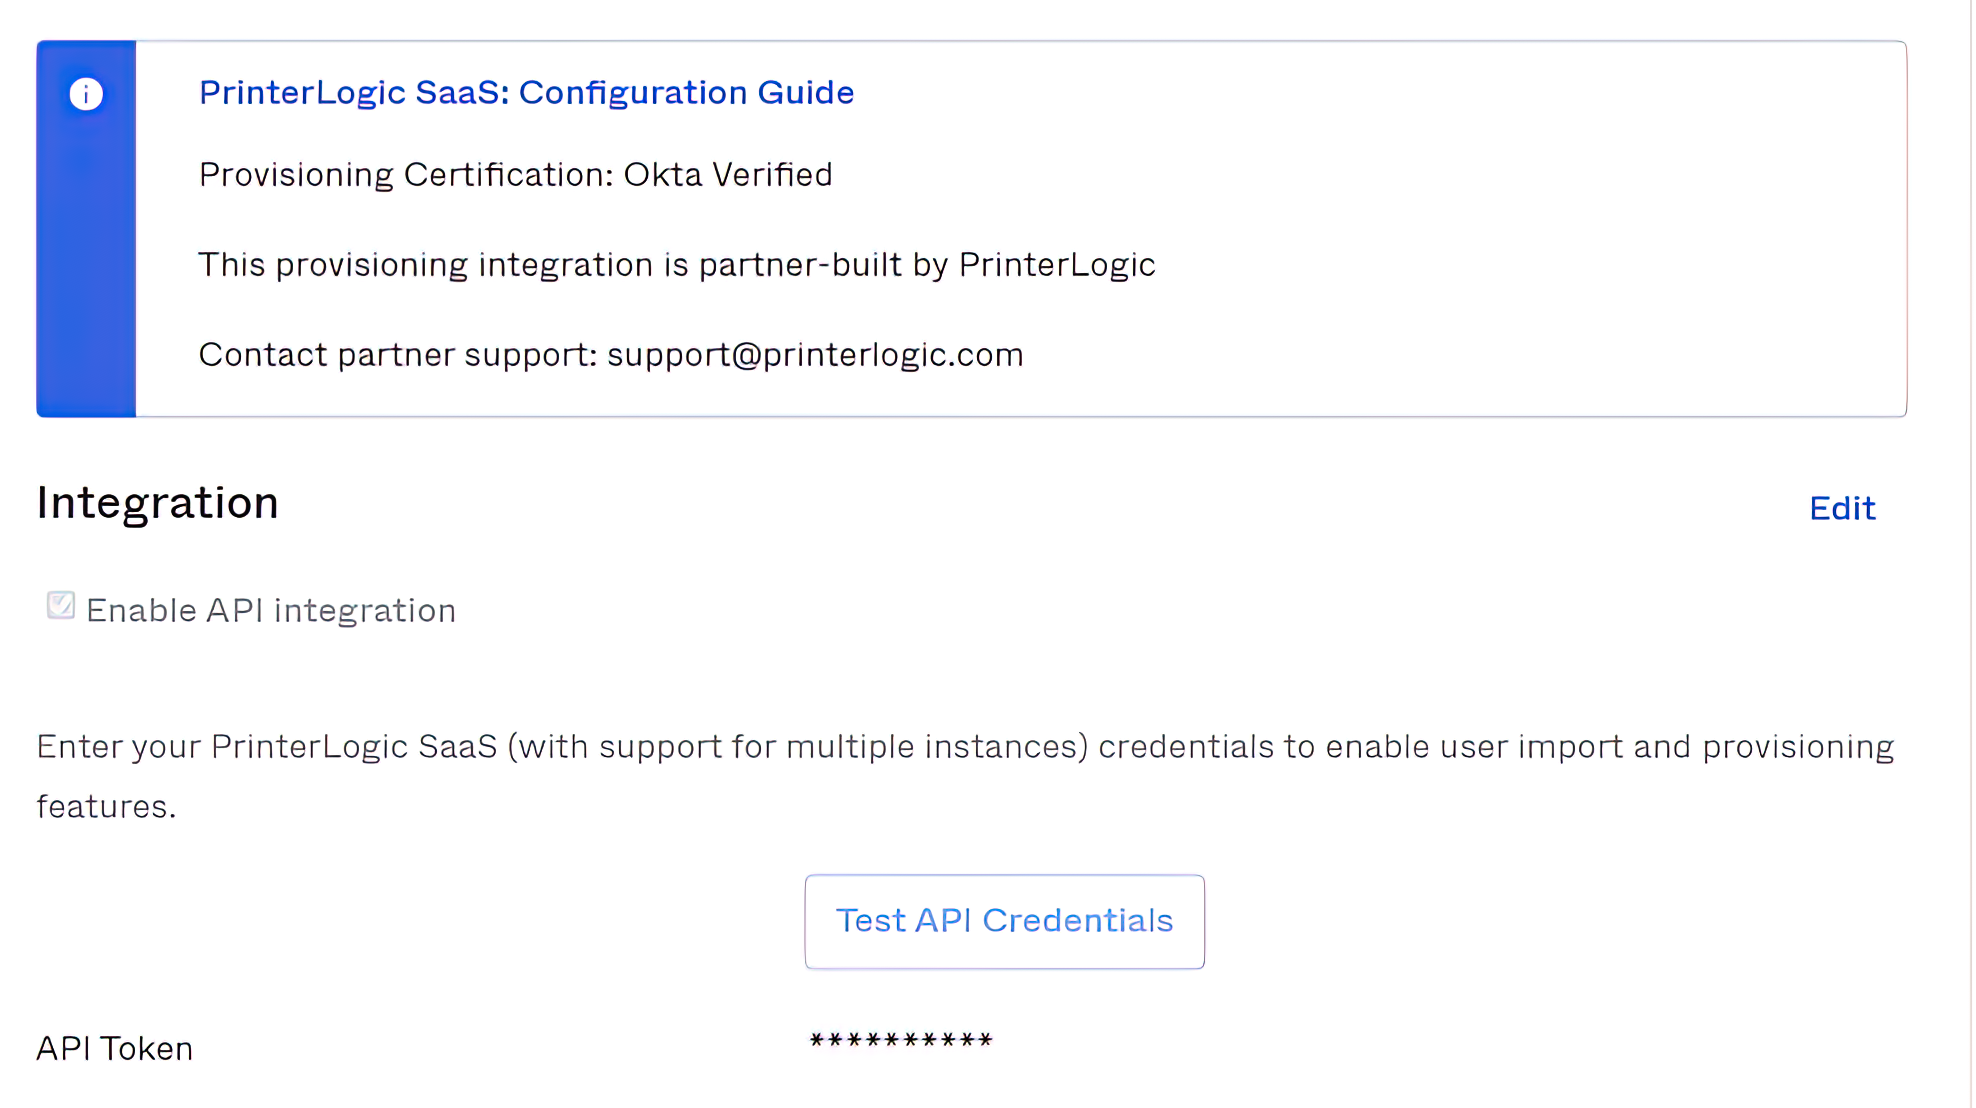
The SCIM token is entered on the Provisioning tab under Integration.
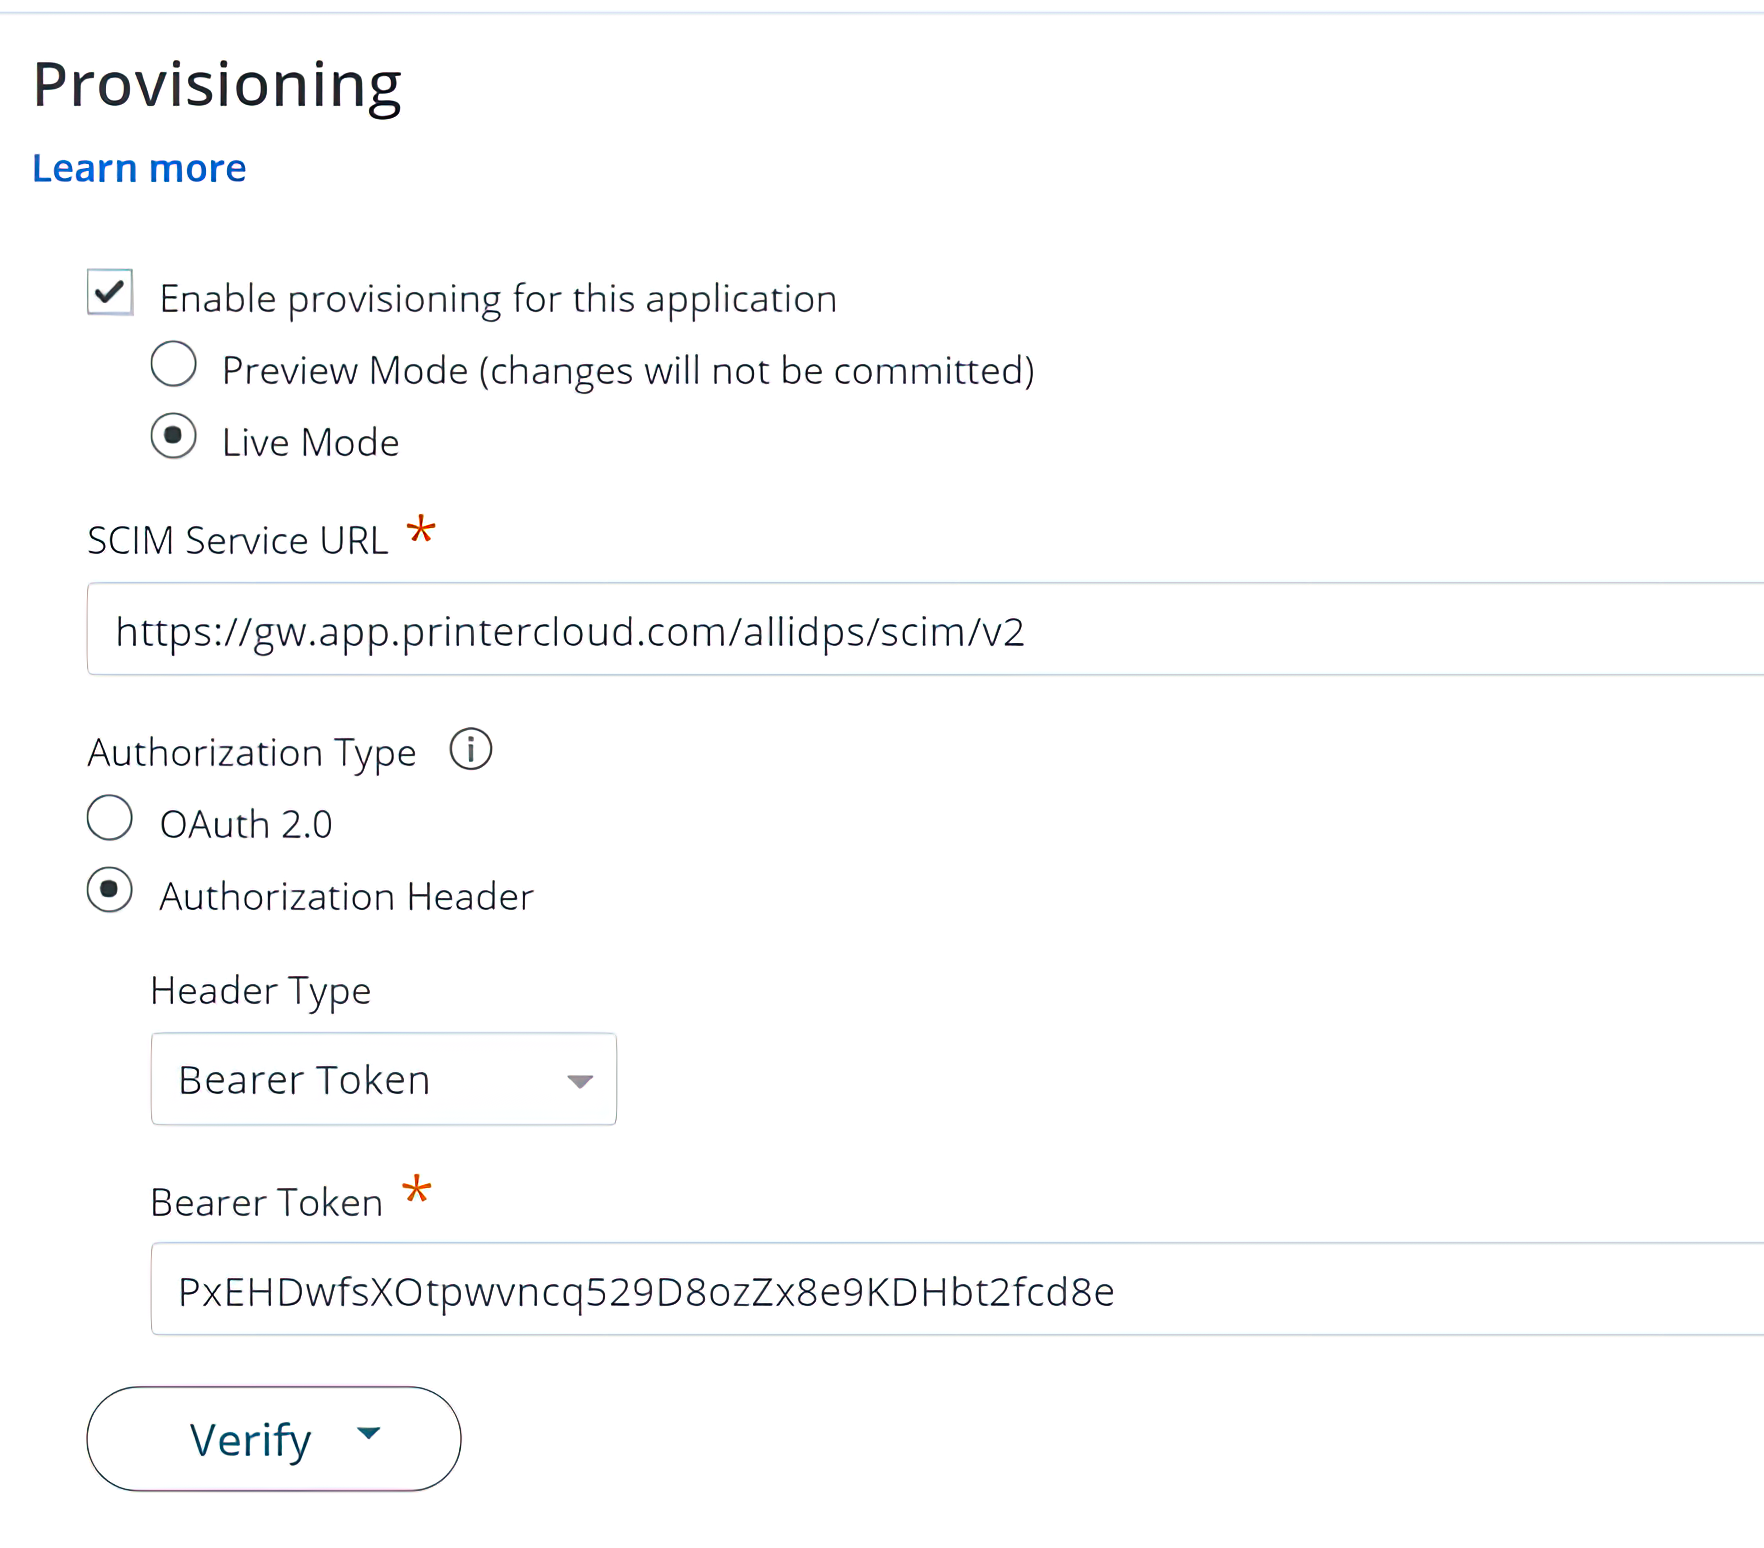
CyberArk (formerly Idaptive)
For companies using CyberArk, the relevant information is found under the “SCIM Server URL” and “Bearer Token” fields, which live on the Provisioning page.
Conclusion
Vasion’s PrinterLogic platform provides an enterprise solution that supports all of the major open specifications like SCIM, Security Assertion Markup Language (SAML), OpenID Connect (OIDC), and Just-In-Time (JIT). This enables organizations to take advantage of the benefits of IdPs with confidence that security protocols like SCIM are protecting their data.